Persistence Pays

I know you’ve all been on pins and needles wondering whether we liked our paint colors. (Haha)

We (drum roll) love it!!!!!!!

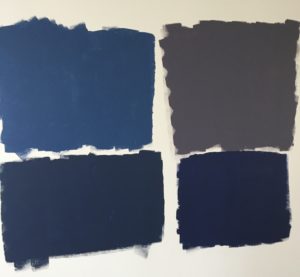
The grey walls of the living room, kitchen and hallway were completed this weekend and I was very happy with the results. I still hadn’t decided on the accent wall.

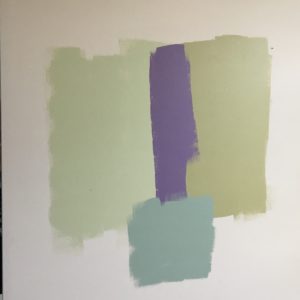
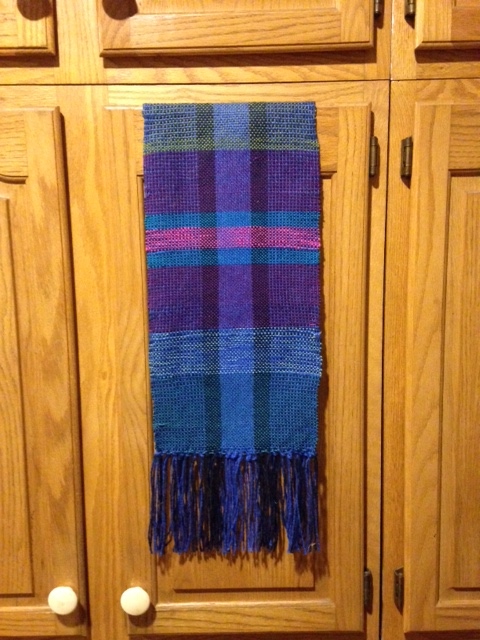
I narrowed down the accent wall colors to two samples: “NightFlight” (a dark navy) and the “Newburyport Blue” which was definitely more purple than blue. I asked everyone for an opinion and almost every time they would choose the purple one. Every time they did, I had this contrary sense that I really wanted the alternative.

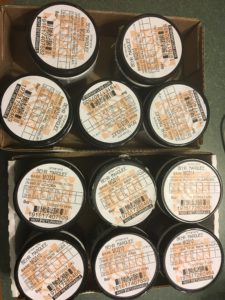
Last night, pondering it once again, I went back to look up the color online and realized that the paint sample I’d been given couldn’t be right. I decided to have a new sample made up from a store that normally works with Benjamin Moore paints. As soon as we opened the can, we knew that THIS was the color intended, not the purple hue. It is just the right balance of color and warmth needed for my accent wall. Perfect!

5 samples of grey and 5 samples for the accent wall. Persistence (and a patient husband) really does pay off.

P.S. I’m figuring out that this wishy washy angst over decorating decisions might be a function of age. I asked a few of my friends and we all admit to finding such decisions difficult now, when in the past we started projects and chose colors a lot more easily. We still haven’t figured out why that might be–just that we share the experience. Any ideas?

Color Confusion

Our entire house was painted in a light cream color, walls and ceilings. (The basement, refinished later, was painted mostly a soft yellow.) It’s time to add color.

Who knew that color could be so confusing?

For the first time, we asked for help from a decorator. She made suggestions that surprised us, but we agreed: a dark accent wall in the living room and gray on the walls. (So trendy!)

I picked out paint chips (with her) and came home to try some samples. Three greys, starting with the darker one she favored, two that I thought were gradient lighter tones,and two dark blues.

This was all happening while a painter did all the ceilings in the living room, kitchen and hallway: ceiling white. We made a snap decision that morning to paint the kitchen because at both entrances, there are no natural divides where one paint could end and another start. This complicated our color choices.

I was really shocked when I painted the samples. It was a bit like Goldilocks and the Three Bears. One color was too dark, one was too light (with strong purple tints), and so on. The accent paints were a deep purple and a too-bright blue.

We waited a day, living with the color and waiting for sunshine, and then went back to the paint store for more samples. Lighter, warm greys and two more dark navies.


I also bought samples for our master bathroom: a light spring green. Again, the first sample I rolled was surprisingly light; the second dark. When I bought another sample, I was shocked by the blue tint. What was going on?

As a quilter, I consider myself to be good with color. Choosing fabric might be my favoritie part of quilting: There’s nothing like walking through a quilt store with bolts of fabric in your arms, placing them side by side to get the right color. I once took a color class and was the star pupil. One of my blog categories is color.

But this? I felt like someone was doing a bait and switch with every sample!

We’re ready to plunge, which is exactly how it feels. We still don’t know if we will like, love or hate the end result.

P.S. We’ve only chosen the color for the main walls. Want to vote on the accent wall? (Even though the picture doesn’t really tell an accurate story either. The one on the top right is actually a dark purple/blue. The other three are closer to reality.)

New House/ Blank Canvas

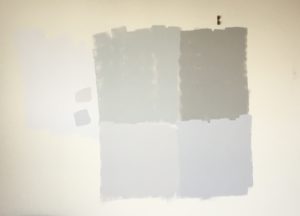
We bought a house in the burbs!

After our lost bid, John spent the next day (while I worked) researching and looking at houses. He found a ranch that he said was “nice, but no glamour–functional, light.” It’s selling point was that the basement was entirely finished and very light and sunny.

We looked at it again the next day and also looked at another that had a lot more glamour but a completely unfinished basement. It also smelled like a smoker lived there.

We ended up going back and forth between the two, choosing the finished basement, clean home (the previous owner’s wife had problems with allergies so it was the polar opposite in air quality) and ranch style, which seemed wise for a couple in their mid-60s.

It’s a little boring, but I’m looking at it as a blank canvas. There is very little work that needs to be done, so we can concentrate on making it our own in other ways.

It is also relatively new–only 11 years old with one owner. This will be a new experience for us as we have always lived in old houses (with the exception of the duplex in Alaska.) It has a brand new furnace and air conditioner and a clean 2-car garage. The main floor walls are all white and the “lower level” is a pleasant yellow. (My friend said it shouldn’t be called a basement.) The deck is functional but uninteresting and the yard is mostly undeveloped, but sunny.

The kitchen/dining room is large and open, a huge contrast to the claustrophobic kitchens I’ve had in the last two houses. I haven’t measured yet, but I think there must be  a good 16-18 feet of countertop compared to what I have now and lots of drawers and cabinets. It will be our first house without a separate dining room, which I think will be a nice change. It also has a small island with a “breakfast bar.” The entire room, including the dining area, is 16’x20′.

This morning I cooked up a Tartan Room, an Alaskan Room, and a sewing area in the bright corner of the basement. There’s even room for a longarm 🙂

This is going to be fun.

(If you are the nosy type, you can look it up on Zillow: 2225 Roaring Creek Dr., Aurora.)

P.S. Today is our 40th anniversary! The proscribed gift for 40 is a ruby, but I think this is better.

Tangled at Home Too!

For the past six weeks, I have been trying to write/edit/manage a post about my “Triple Tangled Tartan.” My pictures kept coming out blurry and I was unable to figure out how to fix the problem so I set it aside, time and time again.

In the meantime, we’ve been focused on our house, trying to get it ready to put on the market. We met twice with realtors and started working on some of the projects they recommended: the fireplace screen, a new bathroom floor and vanity; stripping the last vestiges of wallpaper in our house, repairing and repainting walls and ceilings.

At the same time, John has been working through financial issues related to retirement, insurance and taxes. I have been working 2-3 days a week, with an occasional week off. I also have been cleaning, packing and purging, little by little. We had hoped to list the house in April, but have recently decided to wait until we return from New Zealand.

But every Thursday, I set aside most of the day to visit The Chicago Weaving School, where I am getting close to completing my tartan weaving project. Class time is four hours and the commute is almost an hour each way, so it is a full-day endeavor.

I work mostly on my own now, weaving back and forth, and frequently changing my colors to follow the sett or pattern. I can catch mistakes more quickly now, and fix them with relative ease. I’ve figured out some of the idiosyncrasies of my loom and learned how to work around them. Each week I inch closer to the end of my warp, closer to the finish line.

Maybe all that neatness or order is helping me cope with the tangled life at home, helping me envision the day when all will be set right and we will be ready to move on to the next home, next season of our lives.

Maybe.

Tripled Tangled Tartan (Part II)

I also started my tartan weaving project. I decided to stick with the Bruce tartan since I knew it so well. The project is a little ambitious for a first-time weaver, but I think it will be worth it in the end, helping me understand tartans on a whole new level.

The classes are four hours long. I spent the first week planning my project, using a warping frame to measure all the yarn I would need, and putting the yarn–174 ends–through the reeds. At the end of my first session, this is how my project looked, a bit tangled:

IMG_0141

While I dressed the loom the following week, it was even worse:

IMG_0201

Each of those 174 ends now had to be threaded through the heddles, in order: 1-2-3-4, 1-2-3-4. When I finished that we checked my threading and my “sheds” to find any tangled or misplaced threads. Then we tied the ends and adjusted the tension of the threads on the back bar and started rolling the threads onto the back bar. With every turn of the ratchet, I had to straighten the threads, removing all the tangles. When I was done, it looked like this:

IMG_0218

IMG_0227

Tripled Tangled Tartan (Part III)

After all that, I was able to begin weaving. We started with a header in plain weave and then moved on to a twill, the characteristic weave of tartans.

I thought twill was a simple pattern of two-over and two-under, but it is more complicated than that. There are four treadles and I have to lift two of them at a time (1 & 2, 2 & 3, 3 & 4, and then 1 & 4) to achieve the twill pattern. Each time I press the various treadles, a different “shed” is formed and I slip the shuttle through the shed from one side to another. This is how it looked at the end of session two:

IMG_0226-1

By my third session, I was ready to start following the tartan pattern, or sett, in my weft. When I dressed the loom, I set up the warp according to my sett. When I do the actual weaving, I am adding the weft or horizontal pattern, still following the sett.

IMG_0266Now it is starting to really look like a tartan!

This week I spent the whole session weaving, making real progress on my tartan. When I was almost at the end of my session, I discovered a mistake in the warp, an extra small green and red stripe in the pattern. I’d already fixed a few mistakes in the weft, by un-weaving, but this wasn’t fix-able.

I don’t know if you know this about quilters, but we like to point out our mistakes, even when we know that no one else (except maybe another quilter) notices or cares. We also live with our mistakes when we can’t do anything about them. Sometimes we do rip things out and fix them, but often enough we just have to leave them alone.

Amish quilters supposedly add an intentional mistake because it would be presumptuous and prideful to make something perfect. This was called a “humility block.” It’s a good story, but probably not true. The fact is, mistakes happen and quilts (and tartan cloths) are still beautiful, perfect or not.

Kind of like people, a little tangled.

A Beginning

Last night I took my first weaving class.IMG_3692

I spent two hours at The Chicago Weaving School (Irving Park and Keeler) learning beginning weaving in a one-on-one session with owner, Natalie. The school is a large storefront filled with over fifty looms of all shapes and sizes.

Four small floor looms were “dressed” in various colors, ready to begin a project. I chose one with two shades of blue warp threads. She introduced me to the vocabulary of weaving; to warp, weft, shuttles, draw, heddles, harnesses, reeds and so on.

IMG_3691Mostly, she let me play. She brought me a huge basket of yarns and had me wind a shuttle with my choice of color (green.) I sent the shuttle back and forth about forty times before she stopped me to show me how my edges were drawing in. She taught me how to leave the weft yarn at an angle so that when the beater bar pressed it in place, it had enough extra give to go through all the warp threads without pulling too tight.

I wove a basic weave on a two-harness loom with foot pedals. The right pedal lifted the every other thread up making a “shed”, a triangular opening for the shuttle. The left pedal brought the alternating threads up, again forming a shed. By alternating the pedals, I was weaving a basic in-and-out pattern of over/under one thread. On a more complicated loom that pattern can vary more.

For instance, the tartan weave is always a “twill” pattern of over/under two threads. It requires four harnesses (the part of the loom that lifts the threads) and four lifters. “Lifters” is my word–I can’t remember or find the proper word yet–they are controlled either by the foot pedals or by hand devices that lift the required harness. (Need to learn more about these next time.)

IMG_3689I tried different colors–green, bright green, purple, aqua, and a mix of two threads (blue/green). It was really interesting to watch what different colors did to the overall design.


In two hours, I finished this:

IMG_3696

What is it?

A beginning.


(Sometime after the holidays, I will sign up for a four week Wonder Project (four 4-hour sessions) and attempt to weave some tartan cloth or placemats.)

“Toto, I have a feeling we ARE in Kansas.”

IMG_3266 2For some reason I am getting a kick out of being in Kansas. I came to attend a conference on Swedish Genealogy, but have also been able to visit with two “gold friends” while here. Last night I got to watch the lunar eclipse/red moon from a balcony overlooking the little ArKANSAS river. (That’s how they say it.)

I flew to Witchita in a long narrow plane and was picked up at the airport by one of my nursing school friends, Jeannie (Kirstein) Hett. We chatted as she drove me out to the little Swedish town of Lindsborg. We had dinner at the Swedish Crown and then she left me at the opening event of the conference. The next morning I spent a few hours in the computer lab asking questions that I’d come across in my research. (“Does that phrase really mean divorce? This one seems to be saying that he was punished for stealing. Am I right? What does this phrase mean? Oh, ‘escaped from service’ next to ‘leaving for America.’ Cool.”)

FullSizeRender
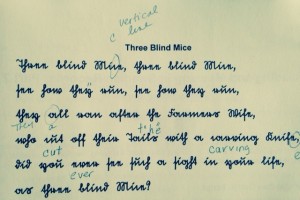
That afternoon and the next day were spent in lectures about burial practices and graveyards (I had a hard time staying awake through that one,) finding living relatives, military records (I do have a couple of soldier ancestors and had already found my way around some of these records,) and two sessions on understanding Swedish written in Gothic handwriting. It’s fairly easy to use the Swedish records for the basic facts of an ancestor’s life, but interspersed in the records are all kinds of remarks, written in Swedish in this old style of writing. Many S’s look like f’s, which is true in English as well, but I learned that most a’s aren’t closed so that they look like u’s; e’s look like n’s, h’s can look like g’s and so on. The above example is a gothic font (so much more uniform than normal handwriting) of Three Blind Mice in English. Look closely to see how challenging reading it can be, and then imagine the variations of handwriting, the extra flourishes, and the Swedish language.

Once you get the letters figured out, you still have to figure out the meaning of the Swedish words. But what fun when you untangle something interesting, like that 1908 divorce or two oåkta or illegitimate great and great-great grandmothers! A mormor (grandmother on the maternal side) and farmor (on the paternal line) grew up as fosterdotters, one because both parents died by the time she was six and the other, presumably, because the mother was unable or unwilling to take care of her. I love the stories.

When the conference was over, Jeannie picked me up again and we met a Chicago friend, Richard, for supper. In a few free minutes I’d called the Hammers to tell them about a mutual friend’s death. I started out the conversation by saying “Guess where I am?” and Richard immediately guessed Witchita, Kansas. He was here too, closing on his mother’s house in the morning and then traveling with her to her new home in Arizona.

And then we came back to Jeannie’s condo just in time to watch the lunar eclipse from the balcony. Pretty cool. I’d arrived in Kansas to dark clouds reminiscent of the early scenes in the Wizard of Oz and then spent the next three days under blue skies and a brilliant sun (and a red moon.)

And I will return home with bulging bags and a boggled mind, ready to continue my Swedish research on a different level. Not that I will have time to do so–the next trip is only three weeks away and requires a bit of prep. I’m going to New Zealand with my friend Marilyn, with stops in Tuscon, Phoenix, LA and Hawaii along the way 🙂 I also have to finish one more week of full-time/vacation coverage work, plus another 5 days in early October AND I want to get all our NZ Christmas and birthday gifts ready.

But Kansas was fun and a little crazy.


Color in a Jar

I spent the morning mixing concoctions of color!

About a month ago I went online and purchased six jars of fiber reactive dye from the Dharma Trading Company. Golden Yellow, Cobalt Blue, Lemon Yellow, Turquoise, Kelly Green and Forest Green. The first four were the blues and yellows needed to follow the recipes in my dye book. Lemon Yellow and Turquoise being “clear” colors or what we might know as primary colors and Golden Yellow and Cobalt Blue being muted or mixed colors. I also bought the Forest Green and Kelly Green because they looked like approximations of the colors I was seeking for my quilts.

I really hesitated before clicking on the “Submit Order” button in the Checkout. Did I really want to do this? I wasn’t sure but something in me felt that I needed to try it out for the sake of some kind of thoroughness in the learning process I was undergoing. Did I want it enough to blow $40 on products and shipping? That was probably the harder question, but I clicked anyway and waited for the arrival of my purchase.

This morning was my third dyeing session with these synthetic dyes (as opposed to the natural dyeing I’ve so enjoyed.) The first two times were mostly lessons in the process. Linda Johansen, the author of “the only book about dyeing you’ll ever need” warns that it takes a few times to learn the process before dyeing becomes comfortable and fun.


It’s good I was prepared for that because for the most part the first session of dyeing produced a few pieces of overly dark fabric that I didn’t even bother to wash or dry. That might have been a mistake because the second session produced what looked like more overly dark fabric as well. But this time, I washed it three times and put it in the dryer before heading to bed. I was delighted to find some interesting colors in my dryer the next morning! Unfortunately, however, all the labels had disintegrated in the washer/dryer so I could only guess at which formulations created which colors. Not good. Still, it felt like a small success and baited me to continue.


So, on a quiet (grey)  Saturday morning, I once again set up my space and started mixing colors. I made five dye mixes and then started the process of following the recipes I’d written out.


The process goes something like this:

  1. Place a quart sized labelled ziploc bag in a container.
  2. Measure out the amounts of dye required into a measuring cup 1C.
  3. Add water fill the 1 cup measure and pour into the Ziploc bag.
  4. Add fabric (I only used small pieces, about 5×5″, not the 1/4 yards suggested.)
  5. Add soda ash solution (soda ash, water, and salt previously mixed.)
  6. Close bag, removing as much air as possible & agitate to mix fluid and fabric.
  7. Repeat process with different color formulations (I did 12 today.)
  8. Agitate bags every 10 minutes x 9 or 90 minutes.


This is what I am doing as I currently write. I set the timer on the oven for 10 minutes and go do other stuff between the timer’s beeps. I took a garbage bag down to the TV room and cleaned up quite a bit in ten minutes. I’ve emptied the dishwasher. I’ve checked Facebook. And I’ve written most of this. I still have 30 minutes to go.

Then the fabric will sit in the pouches until later this evening. Johansen recommends leaving it overnight and I might do that, but it seems like it is better for me to do my laundry runs in the evening.

I’m thinking that maybe later today I’ll repeat the process once more, using up the colors I mixed up this morning. In the meantime, I’m going to go for a walk with my friend Patti and then take Lizi out for lunch. I also need to go find some Tyvek to label my fabric for the washing and drying process later so that I’ll know which recipes made the various colors that I’m going to pull out of my dryer tomorrow morning 🙂

Voila!


Here are the quarter and semi-finalists for the color I originally set out to make:


Color My World

I have so enjoyed the autumn colors this year. I think it’s because I started harvesting color for my natural dyeing experiments. Wherever I go I’m hyper-alert to the colors of nature, looking up at the beautiful fall trees and down at the grasses and undergrowth along the sides of the road.

I’ve traveled many miles this month so I’ve seen a lot of the colors changing. In late September we flew to Eagle River, Wisconsin where the colors were just getting started. In early October I drove to Western Michigan along the Blue Star Hwy, where the color appeared to be starting to peak. Then I drove across the state to the Detroit area and back, as well as a trip north of the city to a sheep farm in Romeo. There was so much color to drink in and I stopped frequently trying to capture the color with my camera. I took the side roads whenever I could because the slower pace allowed me to enjoy the color just that much more.


No matter how you try, it seems almost impossible to capture the intensity and variety of color in nature. I kept thinking I’d just passed the most amazing picture and every time I did stop, it didn’t seem like I’d found the perfect shot. At some point I decided the red of my car fit quite nicely into the autumn palette.


It’s not just the trees that caught my attention, but the undergrowth blooming with more delicate color.


And then, a different kind of color in the Lake Michigan sunset…


And back home, the colors harvested from my late autumn garden.


And Black-eyed Susan’s moved from where they popped up spontaneously in my raised vegetable bed to a more appropriate place next to their image painted on the garage.


One last trip up to close Balgownie, Mrs. Bendelow’s cottage in South Haven, at the end of the peak color was magnificent. Cranberry fields and more stunning trees.


A trip to the “arboreto” was full of subtle colors:


I’m trying to squeeze every bit of color out of every day right now. It’s been a spectacular fall, but I know it is going to be over soon. And then there will be a lot of gray days ahead and even on the bright sunny days, daylight will be limited. We’re heading toward the winter solstice (and the end of the world too on Anne’s 21st birthday, 12-21-2012.) Winter is sewing time so there will still be lots of color in my life! I will so need it by then.


In the meantime, here are my latest coloring projects, left to right: aspen leaves, sumac, and marigolds and the colors they produced.